Getting Started in WvW
1. What is World vs World?
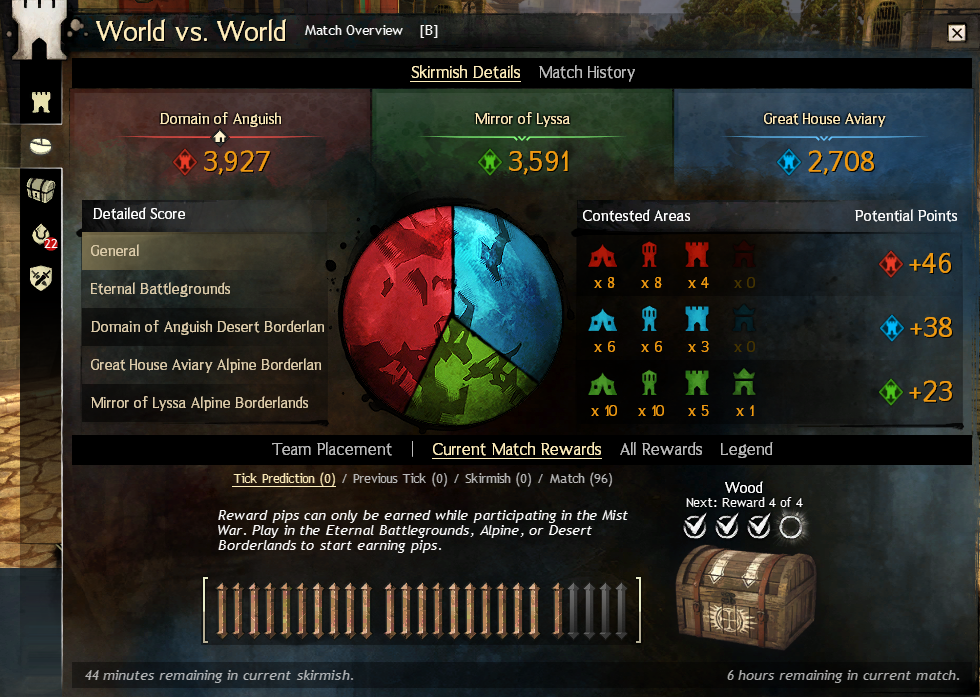
World vs World (WvW) is Guild Wars 2's persistent large-scale PvP mode. Three worlds (servers or alliances) battle across four maps for a full week, capturing and defending objectives — Castles, Keeps, Towers, and Supply Camps — to earn Points Per Tick (PPT). The world with the most Victory Points at the end of the week wins the matchup and advances or falls in the league tier system.
WvW is unique because every player on a server contributes to the same score. A solo player flipping a tower at 3am is just as real as a 50-man zerg fight at prime time. There is no individual ranking or MMR — only your world's collective performance.
2. How to Enter WvW
Accessing WvW requires no expansion — it is available to all Guild Wars 2 accounts including free-to-play accounts (with some restrictions on map access during queue times).
Press B to open the WvW panel. You can rebind this in Options → Key Bindings → World vs World.
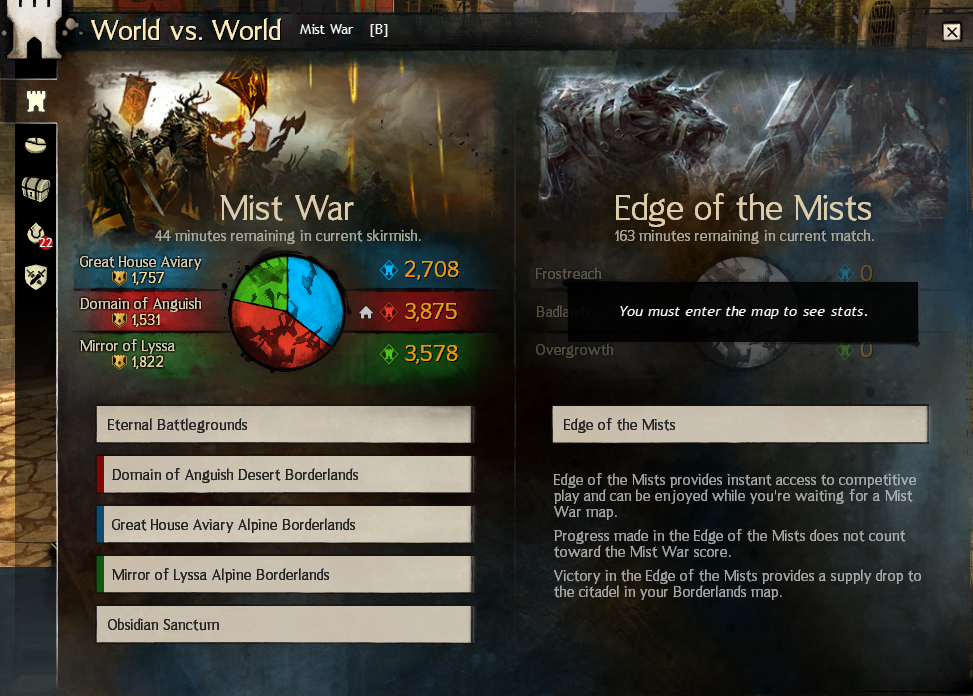
Once the WvW panel is open you will see four map options:
- Eternal Battlegrounds (EBG) — the central, three-sided map with Stonemist Castle.
- Red Borderlands — your world's home Borderland (Desert BL).
- Blue Borderlands — enemy world #1 Borderland (Alpine BL).
- Green Borderlands — enemy world #2 Borderland (Alpine BL).
Click a map, then click Enter. If a queue exists you will see an estimated wait time. EBG often has the longest queue; Borderlands are usually faster to enter.
Start on your world's home Borderland (the Red BL if your world is listed as Red). This map is slightly easier to navigate and your team is usually more active in defending it.
3. The WvW Boost
The moment you step onto a WvW map, your character's stats are automatically boosted to level 80 equivalent combat stats. This means a level 1 character with no gear can participate. However, the boost has important caveats:
| Factor | Effect |
|---|---|
| Level below 80 | Stats scaled up to level 80 equivalent |
| Missing traits/utilities | NOT provided by the boost — blank trait lines weaken you significantly |
| No gear equipped | Boosted to base level 80 stats — far below a geared player |
| Full exotic gear | Large improvement over boosted baseline — recommended before serious play |
| Ascended gear | ~5% stat increase over exotic — worthwhile for long-term players |
The practical advice: unlock your trait lines and utility skills first, then worry about gear. A well-built exotic character with fully unlocked traits will consistently outperform an ascended character with empty trait slots.
4. First Steps on the Map
You will spawn in your world's garrison — a fortified starting area near the edge of the map. From here:
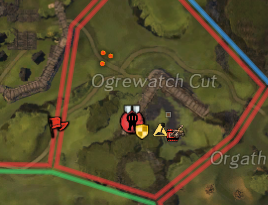
- Open the map (M) and familiarise yourself with the layout. Green icons are your world's objectives; red and blue belong to enemies.
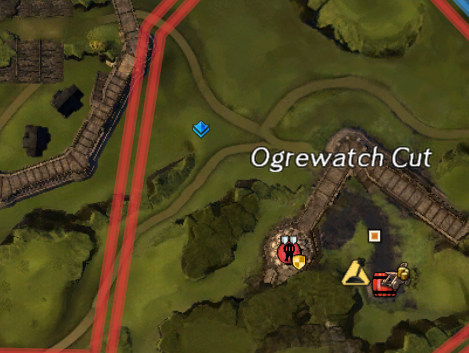
- Look for a commander tag — a coloured diamond on the minimap. Run to it.
- Stay within the commander's group. Do not run ahead alone.
- Follow the commander's movement and attack/defend whatever they target.

5. Following Commander Tags
Commander tags are purchased for 300 Gold + 250 Badges of Honor (Commander's Compendium) and represent an opt-in public leadership system. A player with a tag visible (not "closed squad") is publicly guiding their group. See the full Commander System wiki for tag costs, the Catmander variant, lieutenants and squad mechanics.
| Tag Type | Symbol | Meaning |
|---|---|---|
| Commander Tag | ◆ Coloured diamond | Full public leader; organises squads up to 50 |
| Mentor Tag | 🔰 Green badge | Teaching role; does not organise full raids |
| Closed Squad | No icon visible | Private group; invite required |
Tags come in 9 colours (Red, Orange, Yellow, Green, Cyan, Blue, Purple, Magenta, White) with no mechanical difference — commanders choose colours to distinguish multiple tags on the same team. Some communities use colour conventions (e.g., red = main zerg, blue = havoc group).
The single most common mistake is wandering 200+ units away from the tag when the commander engages. Stragglers die first and split your group's AoE coverage. Stay close.
6. Roles You Can Fill
WvW in a group context has distinct roles. As a new player you will naturally fall into the DPS / Damage category, but understanding all roles helps you grow.
| Role | What they do | Examples |
|---|---|---|
| DPS | Deal high damage; burst priority targets, cleave with AoEs | Berserker builds, Power Reaper, Dragonhunter |
| Support | Provide boons (Stab, Quickness, Alacrity), heals, and cleanses | Firebrand, Scrapper, Tempest |
| Boon Strip | Remove enemy boons (Stability, Aegis) to enable burst | Chronomancer, Spellbreaker, Scourge |
| Roamer | Solo or small-group; decap camps, kill scouts, disrupt flanks | Thief, Ranger, Mesmer |
| Havoc | 5–15 player group; quick objective captures, splitting enemy blobs | Any efficient build composition |
7. Recommended Hotkeys
Set up these bindings before your first session:
- B — WvW Panel (check objectives, queue)
- M — Map (orient yourself)
- Ctrl + click — Ping an enemy or location for your squad
- Shift + click enemy — Call a target for your squad
- T — Target the called target (syncs your focus with the commander)
- F5 or / or Squad chat — Text your squad (check keybinding)
Using Ctrl+click to ping and Shift+click to call targets is one of the highest-value habits you can form — it costs nothing and immediately makes you useful to commanders.
8. Understanding Supply
Supply is the lifeblood of WvW. Everything that matters — building siege weapons, repairing gates and walls, upgrading objectives — requires supply. Each player can carry a limited amount:
| Source | Supply Provided |
|---|---|
| Default carry capacity | 10 supply |
| WvW Ability: Supply Capacity (max) | +5 = 15 supply |
| Supply Camp | Passive trickle to nearest objective via Dolyak caravans |
| Emergency Waypoint (Invading) | No supply — must build everything from zero |
As a new player: if your garrison is under attack, pick up supply from the depot and use it to repair gates and walls. Right-click a gate or wall and select Repair. Even a few hundred repair points on a gate can buy your defenders crucial extra minutes.
9. Earning Rewards Early
WvW rewards are tied to participation — you earn WvW experience by fighting players, capturing objectives, defending objectives, escorting dolyaks, and completing events. This XP feeds your Skirmish Reward Track, which pays out currencies and eventually Skirmish Tickets.
Check the Daily WvW achievements (the Achievements panel, WvW tab). Completing 3 dailies every day is the fastest way to earn Mystic Clovers via Skirmish Ticket tracks and stack WvW rank quickly.
10. Top Tips for New Players
- Follow the tag, always. The commander knows the map; you do not yet. Trust them.
- Don't use siege without permission. Arrows and Ballistas waste supply when a fight is moving. Ask or wait for a call.
- Repair gates when defending. It requires no skill, costs nothing but supply, and is deeply appreciated.
- Learn the map over time. After a few sessions you will start recognising tower positions, common flanking routes, and spawn points.
- Enable squad chat voice. Discord or in-game proximity voice with your commander's group transforms your experience.
- Don't trade-talk or flame. WvW is a team mode. Attitude matters more than skill rating at large scales.
- Use food. Even cheap food like Bowl of Salsa or Fried Golden Dumpling provides a meaningful stat boost that helps you survive.
Track Your World's Objectives in Real Time
MistIntel shows you live objective ownership, PPT, flip alerts and commander positions across all four maps simultaneously.
Open MistIntel →